Thursday, 29 October 2015

Lemon Poppyseed Muffins

I find muffins to be the best thing for lunches.... They are easy to pack, the kids love them, and since I can only make 12 at a time I can't be snack happy eating them all, or I end up having to make another batch before the week is through, Kinda like I did with the Orange Cranberry Loaf I made earlier this week (it's my favorite! Don't judge me if I ate 1/2 the loaf throughout the day!!!)  That recipe will come next week  :)
I didn't have a good lemon muffin recipe, so off to Google I went and found a delightful recipe on a blog I really enjoy, www.twopeasandtheirpod.com.  I changed it up a little and was really pleased with the results.  I used half whole wheat flour (I really wanted light and airy and didn't want to chance them being too dense, but the next time I make them I will definitely use whole wheat!)  I also cut the butter down by half.  The original recipe called for greek yogurt, but since I was out I just used plain yogurt, These were so easy to make I can't believe I procrastinated so long in making them!!!  
The best tip for these is to blend your lemon zest and sugar really well.  It allows the sugar to absorb all the flavor from the zest and the results are a little heavenly.  I hope you enjoy these as much as I do!!!
So good with a cup of coffee in the morning!  This is my favorite mug, it's about 23 years old!

To Make Lemon Poppyseed Muffins you will need:
  • 2/3 cup sugar
  • grated zest and juice from 1 lemon
  • 1 cup all purpose flour
  • 1 cup whole wheat flour
  • 2 tsp baking powder
  • 1/4 tsp baking soda
  • 1/4 tsp salt
  • 3/4 cup yogurt (greek or plain) sour cream can also be used
  • 2 large eggs
  • 1 tsp vanilla
  • 1/4 cup butter, melted and cooled
  • 1/4 cup applesauce
  • 2 Tbsp poppyseeds
Preheat your oven to 425 degrees F.  Grease 12 cups in a regular size muffin pan or line with paper muffin cups.
In a large bowl, combine lemon zest and sugar until the sugar is moist and the fragrance of the lemon is strong (I "smushed" them together with a silicone spoon, but you can also just rub them together with your fingers).
Whisk in the flours, baking powder, baking soda and salt.  set aside.
In another bowl, whisk all the wet ingredients together until well blended.
 Pour the wet mixture over the dry, add the poppyseeds and gently stir to blend.  Do not overmix!
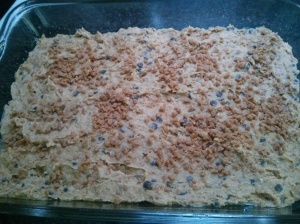
The batter almost has a mousse like consistency.
Divide the batter evenly among the muffin cups.
Bake for 5 minutes and then turn oven down to 375 degrees F for another 13 minutes, until the tops are golden and a toothpick inserted in the center comes out clean.
 Allow the muffins to cool in the pan for 5 minutes and then carefully remove them from the pan and allow them to fully cool on a wire rack.
I didn't frost mine, but if you would like to put these over the top, combine 1 cup of icing sugar with 2 or 3 Tbsp of lemon juice and drizzle over cooled muffins.  YUM!!!

Enjoy!!!

Monday, 19 October 2015

Pumpkin Streusel Bars


Have you ever just made a complete mess in the kitchen???  I mean, one mistake after another?  I was just making a simple pumpkin pie, it really should not have been that hard!!!  Yet somehow, I ended up knee deep in pumpkin, mistake after mistake, and would end up using all the mistakes to produce 3 wonderful desserts!  I only wish I was taking pictures!!!!  So my mistakes?  Trying to rush would have been the first, and in my rush I opened a can of condensed milk instead of evaporated, so now I needed to use the condensed milk... enter Pumpkin Streusel Bars.  I found this idea on a lovely blog,   http://www.sweetandsavorybyshinee.com/ and have made it a few times now, it is so good!  It packs great in my kids lunches, is fairly simple to make and quite versatile. I made this a few different ways, and will explain the options in the directions. So, get in your kitchen and whip this up!  You will be glad you did!!


  To make Pumpkin Streusel Bars, you will need:

For Crust:
  • 1/3 cup softened butter
  • 1/2 cup sugar
  • 1 large egg, room temperature
  • 1 tsp vanilla extract
  • 1 cup whole wheat flour, spoon and sweep method
  • 1/2 tsp baking powder
  • 1/4 tsp salt
For Filling:
  • 1/2 cup plain greek yogurt, or low fat sour cream
  • 1 cup pure pumpkin puree
  • 1 can sweetened condensed milk, or dulce de leche
  • 2 large eggs
  • 1 tsp vanilla extract
  • 1 tsp cinnamon
  • 1/4 tsp ground nutmeg, preferably freshly ground
  • 1/4 tsp ground ginger
  • 1/4 tsp salt
For Filling:
  • 1/4 cup chopped pecans (optional)
  • 1/4 cup rolled oats
  • 1/4 cup flour
  • 1 tsp cinnamon
  • 1/4 cup packed brown sugar
  • 3 Tbsp cold butter, cut into cubes
  • penuche frosting
Preheat oven to 350 degrees F.  Generously grease or line a 8x11.5 inch baking pan with parchment paper.
To make the cake base, beat the butter and sugar on medium speed until fluffy.
 Add the egg and vanilla and continue to beat until smooth.  Add flour, baking powder and salt and mix until just combined.
 Spread batter evenly with an offset spatula in prepared pan and bake for 15 minutes.
 Meanwhile prepare the filling.  Add yogurt (or sour cream), pumpkin puree and condensed milk (or for a twist, try using dulce de leche!)
using the dulce de leche.  
 mix on medium high speed with the paddle attachment until smooth.
Reduce speed to low and add eggs one at a time, beating after each addition.
condensed milk... a little lighter in colour  
Add in remaining ingredients and once incorporated, pour over the cake base. Bake in oven for 20 minutes
 For the Streusel, I tried a few cheats on this... one worked well, the other.... not so much!  to make this the traditional way, add the first 4 ingredients in a medium bowl, as well as the sugar and cut the butter in, either using a pastry blender or simply rub it in the with your hands.  
I had about 1/3 cup of penuche frosting in the fridge, so instead of adding the brown sugar and cutting in the butter, I mixed my frosting into the oats mixture.


 It worked perfectly!  The second time I made this, I tried saving about 1/4 cup of the dulce de leche to mix into the streusel, and while it tasted great, it was impossible to spread nicely over the filling, so I wouldn't advise it!
Once you have sprinkled the streusel on the partially baked pumpkin filling, return to oven and continue baking for 20 more minutes until the center is set and a knife comes out clean.  Cool on wire rack for about an hour, then transfer to fridge for a few hours.  Cut into 12 squares and enjoy!

Bon Appetit!!!
Oh and those other mistakes?  I made too much filling for my pie crust, (like, double!) So I added 1/4 cup whole wheat flour and about 1/2 cup of oats and poured it into an 8x8 pan.  It baked up perfectly and was a nice crustless pumpkin pie that my kids loved in their lunches!  Happy endings always rock!!! :)

Friday, 9 October 2015

Yummy Pumpkin Cookies!

I am lucky to be a part of a great program, where I get to try new products for free!  As a BZZZ Agent I recently received a package containing a Venus Swirl Razor and a canister of Venus with a touch of Olay Violet Swirl Shave Prep Cream.  Now, I must confess, I have always used store brand razors, the cheaper the better I thought.... and I have always just used soap to lather.  I was so surprised at how great this razor was!!!!  It doesn't pull on your skin at all, gets every hair and is so easy to use, I went to get a second one for my daughter, who is just starting to need to shave.  And the shave cream?  I stand corrected, what a difference it makes!!!  I suggest you check these products out, I am sure you will be glad you did!!! #gotitfree

 Now that I have that off my mind, let's get to cookies... I know, everyone out there is pumpkin crazy right now, but I am pumpkin crazy all year!!!  In the fall, when pumpkins are inexpensive, I always buy 4 or 5 fresh pie pumpkins to roast and then I freeze them in 1 cup servings, so I always have fresh pumpkin puree for baking!  I will be posting directions for this process in a few weeks.  :)    These cookies are just lovely... they have a cakey texture, which is a nice change, they are not too sweet, so the delicate penuche glaze is just perfect!  I swapped half of the butter for greek yogurt, which made them almost guilt free!  I happily packed these in my daughters' lunches, and they happily ate them!  :)  I hope you enjoy these as much as we do! 
I also always bake cookies on my pizza stones. My cookies bake perfectly, every time. Simply place your stones in the oven while your oven is preheating, scoop your batter onto parchment paper and slide the paper onto the heated stone.  Perfect.Cookies.Every.Time.

To Make Pumpkin Cookies with Penuche Glaze, you will need:
  • 1/2 cup butter, room temperature
  • 1/2 cup greek yogurt, unflavored
  • 1/4 cup sugar
  • 1/2 cup brown sugar
  • 1 cup pumpkin puree
  • 1 egg
  • 1 tsp vanilla extract
  • 2 cups whole wheat flour, spoon and leveled
  • 1 tsp baking soda
  • 1 tsp baking powder
  • 2 tsp cinnamon
  • 1/4 tsp salt
Penuche Glaze
  • 1 1/2 Tbsp butter
  • 1/4 cup packed brown sugar
  • 2 Tbsp milk
  • 3/4 to 1 cup confectioners sugar
Preheat oven to 350 degrees F.  If using pizza Stones, place in oven to heat with the oven.
In a large mixing bowl, cream butter, yogurt and sugars together until light and fluffy.
Blend in pumpkin, egg and vanilla.
In a separate bowl, combine flour,baking soda, baking powder, cinnamon and salt.
Mix flour mixture into butter mixture.
Drop tablespoonfuls 3 inches apart on parchment paper, remove stones from the oven and slide the cookie sheet onto the stone.
 Bake cookies for 12 minutes, until golden around the edges
Transfer warm cookies to cooling racks.
Cool cookies completely and frost with glaze.

For Glaze:
In a medium saucepan, heat butter and brown sugar over medium heat until bubbly.  Cook, stirring constantly, for one minute or until slightly thickened.  Beat in the milk, blend in the confectioners sugar until the glaze is smooth and spreadable.  Using a silicone basting brush, lightly brush glaze on top of cookies.
 The glaze hardens fairly quickly, so keep the saucepan on the stove on the lowest heat to prevent it from hardening.


Friday, 18 September 2015

World's Easiest (and Tastiest) Lasagna!


It has been a while since I have done a post, I apologize...  It has been a crazy summer around my household!  But now, the kids are back in school, routines are being put back in place, and life is as it should be once again... for now!!!
I have to say I did truly love having my girls home all summer... it was great to just be with them, go for bike rides together, check out a few water parks and theme parks, and of course, try out some new recipes!!! I forgot to take pictures of some that were sooo good, so I guess I will have to make them again so I can share them here with you!  We are talking peanut butter chocolate chip cookies, brownies, fruit breads as well as some really delicious, if not addicting, english muffin bread!  You will be hearing from me a lot in the next little while.   :)

Today, however, I thought I should share a staple around here... Lasagna!  I used to go through a whole lot of trouble to make this Italian dish from scratch, we are talking stewing tomatoes to make the sauce!!! And I was proud of my lasagna, it was a ridiculous amount of work!!!  the problem was no one in my house seemed to appreciate my Herculean efforts!  Then one day I was pressed for time so I took a whole lot of shortcuts, and my family raved!!!! I didn't know whether I should be pleased or insulted!!!  Either way, the days of me stewing tomatoes were over!!!!  Now this meal is served almost weekly, it takes maybe 10 minutes to throw together, and in the oven to cook.  It just doesn't get any easier than this folks!!!

To Make this Lasagna, you will need:

  • 450 grams lean ground beef
  • 1 jar of your favorite pasta sauce (I use Ragu Tomato and Basil)
  • 1 1/2 cups water (12 oz)
  • 1- 500 gram container low fat cottage cheese (I use 1%)
  • approximately 2.5 cups shredded mozzarella cheese, divided (more if you like cheesy lasagna)
  • 1 large egg
  • 1 tsp dried basil
  • 1/2 cup parmesan cheese, divided 
  • 12 whole wheat lasagna noodles, uncooked
Preheat oven to 350 degrees F.
In a large sauce pot, cook the ground beef, drain off fat, stir in tomato sauce and water, set aside.
In a medium bowl, combine cottage cheese, egg, basil, 1/4 parmesan and 1 1/2 cups mozzarella, set aside.
Spray your 9x13 pan with non stick spray and pour 1 cup of the sauce in to cover the bottom of the dish.  place 3 noodles on top of the sauce. Spoon 1/3 of the cheese mixture on the noodles and spread to cover.
 Pour another cup of sauce over the cheese layer.  Continue to layer,
finishing with the last 3 noodles on top.  Pour remaining sauce over noodles, then top with remaining mozzarella and parmesan cheeses.
Spray a piece of aluminum foil with non stick spray and cover the lasagna.  Bake for 50 minutes, then take the foil off and bake for another 10 minutes. Let it rest for 5 minutes before serving.
Serve this with a lovely caesar salad and some fresh crusty bread.
 

These pictures show no mozzarella cheese on the top, because I have a daughter that "hates cheese"!! So if the top looks like it has a lot of cheese, she will fuss.  But if I just mix it all in, it is hands down her favorite dinner!!!  Go Figure!!!!!

ENJOY!!!

Tuesday, 23 June 2015

Whoopie Pie Cake


Before I even begin this post, I need to say there is absolutely nothing "better for you" about this recipe!  It is purely indulgent.  But sometimes, that is ok!  My daughter requested this cake for her birthday, so this is what she got.
I found this recipe on another blog I follow, "http://cookiesandcups.com"  and I followed the instructions fairly closely, including the boxed cake mix.  I was concerned that a 'scratch cake' might be a little too delicate and would break in the assembly of this cake, and since it was for my daughter's birthday, I didn't want to risk it.  The only thing I did change was to make my own Marshmallow Fluff, as opposed to buying a jar of the stuff.
We enjoyed this on her birthday and I froze the rest for the weekend.  It froze beautifully!  So treat yourself and your family a little, and freeze the rest for another day or a special lunchbox treat.  Your Kids will love it!

To make Whoopie Pie Cake, you will need:

      Cake 

  • 1 box Devil Food Cake mix,+ ingredients required on box
  • 1 extra egg
     Filling

  • 1 cup butter, softened
  • 2 cups marshmallows
  • 2 tsp simple syrup ( 2 tsp sugar + 2 tsp hot water - stir until sugar is dissolved)
  • 3 cups powdered sugar
     Ganache

  • 1/2 cup whipping cream
  • 1/3 cup cocoa
  • 2 Tbsp sugar
  • 1/4 tsp strong brewed coffee (I used decaf)
  • 1/4 tsp vanilla

For Cake:  Preheat oven to 350 degrees F.
 Line 2 9x13 pans with parchment paper, or grease and dust with cocoa powder.
Prepare oven according to package directions, adding extra egg.  Divide batter between the pans and bake for 15 to 20 minutes, until toothpick comes out clean.  Allow to cool completely.

For Filling:  In a double boiler, place marshmallows, stir to melt.  Add the simple syrup.  This will be very sticky and maybe a little hard to work with.  I added about 2 tsp of the butter while mixing, to make it a little more manageable.
 Remove mixture from heat when marshmallows are melted  and syrup is incorporated.  Mix in butter, then icing sugar (I used my kitchenaid mixer for this).

For Ganache:  Simmer whipping cream over medium heat, stirring constantly until just before boiling (do not allow cream to hit boiling!).  Add in sifted cocoa and remaining ingredients until well incorporated.  Allow to cool a bit to thicken (it will stay fairly runny).

Once the cake is cooled, lift out of pan with overhanging parchment paper and place on serving tray.
 Spread Filling over cake, then carefully place the other cake on top of filling.
 Pour Ganache over the top of the cake, allowing it to drip down the side a little.
Refrigerate until ready to serve, and refrigerate or freeze leftovers.


ENJOY!!!

Monday, 8 June 2015

Cinnamon French Toast Bake

Friday was a PA day in my end of the world, and my daughters had been wanting to make Cinnamon Bread again.  It was fun, and they really enjoyed getting their hands in there, rolling out the dough, sprinkling the cinnamon and rolling it back up! when we pulled the bread out of the oven, it looked perfect!  When we sliced into it.... not so much!
Clearly we didn't roll it tightly enough!  That was ok though!!!  I got a wonderful idea!  I had been craving french toast all week, so I decided to turn this into a French Toast Bake! It was super easy and a wonderful way to start Saturday!!
If you are a "planner", you can very easily prepare this the night before, leave it in the fridge and bake it in the morning. :)
I would also recommend adding blueberries to this, but since I have a few little ones that don't like blueberries as much as I do, I simply serve them on the side.
If you prefer to sweeten this up a little, you can add 1/4 to 1/2 cup of maple syrup to the egg mixture.
This recipe made a perfect amount for 5 people, but can easily be doubled.

To make Cinnamon French Toast Bake you will need:
  • 1/2 loaf Whole Wheat Cinnamon Bread
  • 4 large eggs
  • 3/4 cup milk
  • 1.5 tsp vanilla
  • 1/2 tsp nutmeg (I use freshly grated)
  • 1 tsp cinnamon
  • Real Maple Syrup (optional)
Preheat the oven to 350 degrees F.  Cube the bread and place in a greased 9X9 baking dish.
 Mix the remaining ingredients in a large measuring cup, and carefully pour over the bread, making sure to saturate every piece!
Cover with foil and bake for 30 minutes, until firm to the touch.  Serve with fresh fruit and real maple syrup, if desired!

Bon Appetit!!!

Wednesday, 3 June 2015

Whole Wheat Toffee Crunch Blondies


IMG_20150515_181801There are very few recipes that I have found that cannot be made with Whole Wheat flour.  I am, honestly, a little confused why we ever started using White flour!
So this week I made Blondies… Because they were made with 100% Whole Wheat, they are more of a tan colour, and the natural, nutty flavour of the wheat really came through in this recipe.  My whole family loved them…  I hope yours does too!
To make Whole Wheat Toffee Crunch Blondies you will need:
  • 1/4 cup softened butter
  • 1/4 cup applesauce
  • 2 eggs
  • 3/4 cup lightly packed brown sugar
  • 2 cups Whole Wheat all purpose flour
  • 1 tsp baking powder
  • 1/2 tsp baking soda
  • 1/2 tsp salt
  • 2 Tbsp milk
  • 1 cup toffee bits, divided
  • 1/2 cup semisweet mini chocolate chips
Heat oven to 350 degrees F.  Grease  a 9 x 13 baking pan.IMG_20150515_151912
In a large bowl, beat butter, applesauce and sugar until fluffy.  Beat in eggs until creamy.IMG_20150515_151951
In a medium bowl, mix together flour, baking powder, baking soda and salt.  Stir into butter mixture, add milk.IMG_20150515_152215
stir in 3/4 cup of the toffee bits and all the chocolate chips.IMG_20150515_152559 Spread evenly in the baking pan.
Sprinkle remaining toffee bits over batter.IMG_20150515_153350 Bake for 25 to 30 minutes, until golden brown.  let cool and cut into bars.IMG_20150515_181639
Serve with a scoop of real vanilla ice cream!!!  IMG_20150515_181915